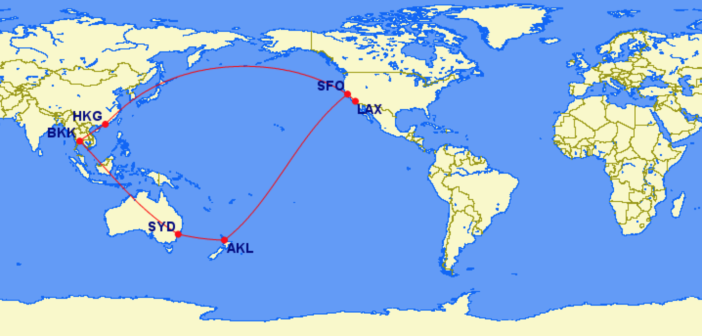
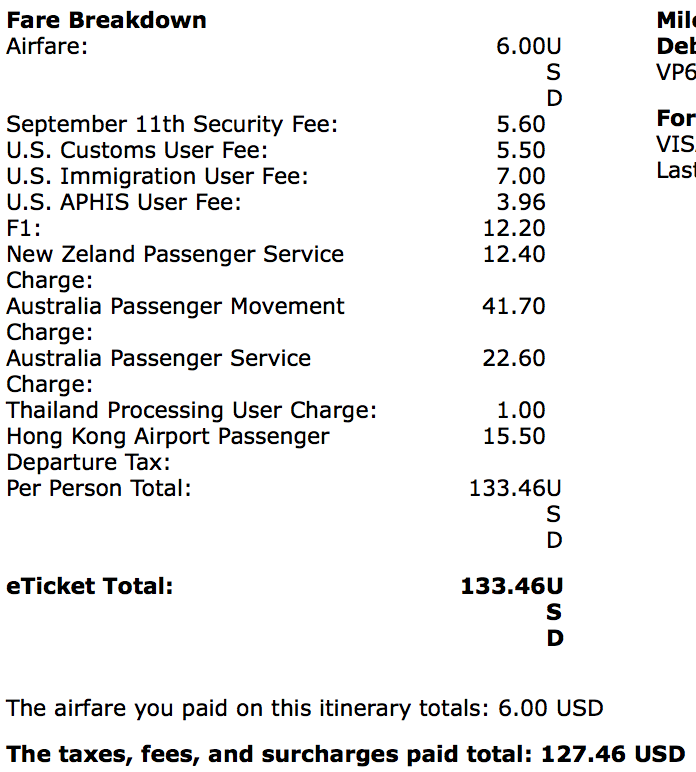
I just booked two tickets from Los Angeles to Auckland, NZ, Sydney, AU, Hong Kong, and back to San Francisco for just 80,000 United miles and $133 in fees and taxes per person!
So how’d we do it? There’s really no secret to it, as 80,000 miles is the standard requirement for round trip Saver Award Economy tickets between the US and Australia/New Zealand using United miles (remember that United is part of Star Alliance which is comprised of 27 airlines including Air New Zealand, Turkish Airlines, Singapore Airlines, All Nippon Airways, Air Canada, and South African Airways to name a few).
The real challenge is making your itinerary fit your preferred dates and locations as December and January are some of the busiest months for travel to and from Australia and New Zealand (it’s summer in the southern hemisphere, after all).
Step 1: Take stock of how many miles you have and how many you need. Since you’ll be booking this trip with United miles you’ll need the miles in your MileagePlus account, or you can hold the itinerary for 24 hours and call back to book once you’ve moved all the miles.
You can earn United miles by signing up for the Chase United MileagePlus Explorer and or Chase United MileagePlus Explorer Business cards (note the best bonuses are 50,000 miles so hold out for those if you can).
Additionally you can transfer Chase Ultimate Rewards (earned with Chase Sapphire Preferred or Chase Ink Plus cards) at a 1:1 conversion ratio into United miles. You can also transfer from SPG, but at a much less valuable conversion ratio of 2:1.
Step 2: Identify your preferred travel destinations and dates. In this case our goal was to visit both New Zealand and Australia, in that order, between 12/25 and 1/8. If your dates and or destinations aren’t flexible then you’ll have to be flexible on routing. Booking award tickets is never a breeze so patience and compromise are key.
Step 3: Identify your departure city. Easy.
Step 4: Identify your arrival city. If you’re flying to Australia or New Zealand there are four airports that have direct United and or Star Alliance flights from the US:
- Auckland, NZ (AKL)
- Sydney, AU (SYD)
- Melbourne, AU (MEL)
- Brisbane, AU (BNE)
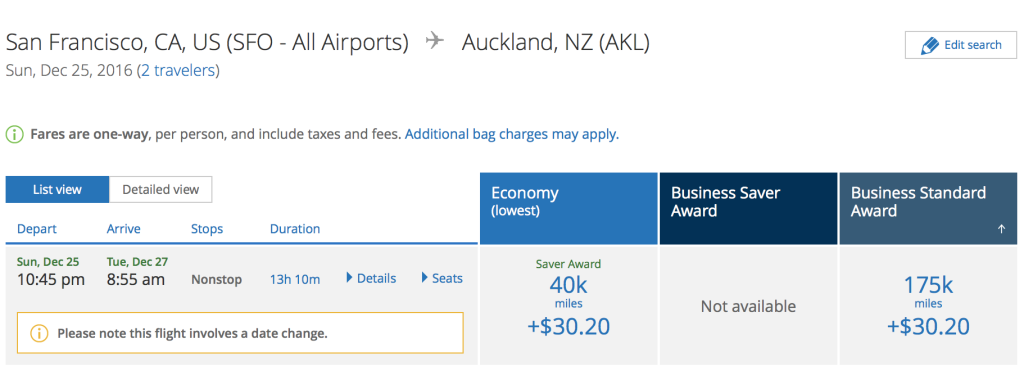
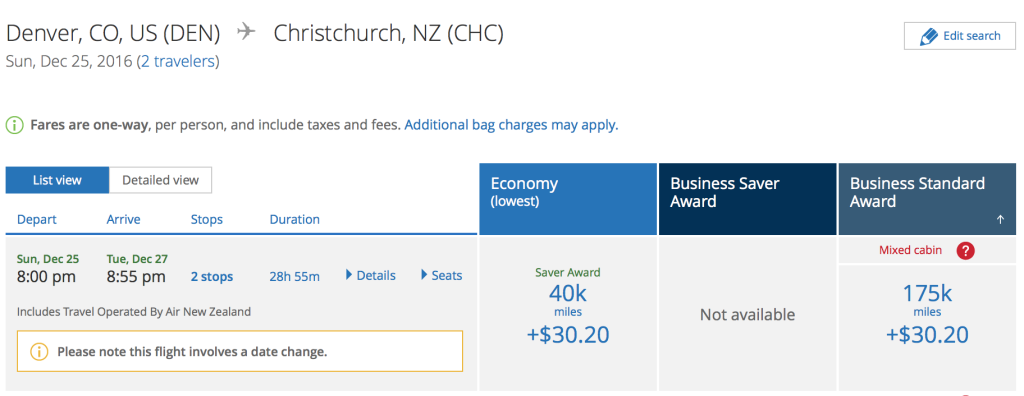
However you can always fly onward to smaller airports for the same amount of miles. For example, flights from LAX to AKL are the same price (40,000 miles) as flights from DEN to CHC (Christchurch, NZ).
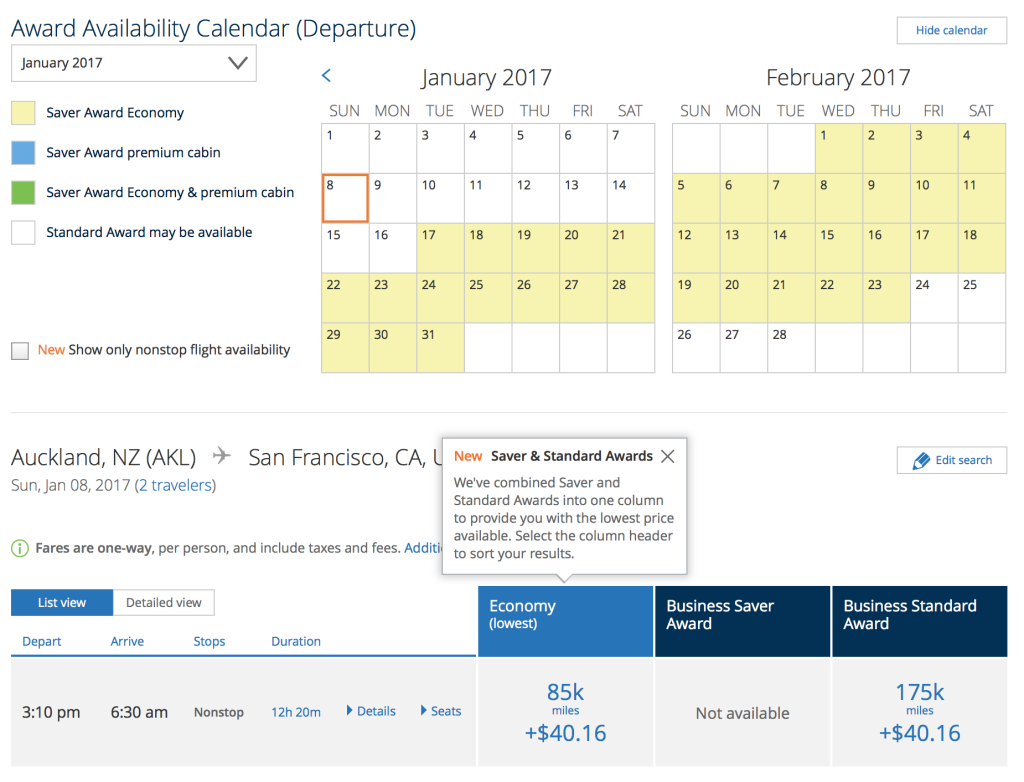
Step 5: Find return flights. This is where things got tough and we had to get very creative. As you can see, there was no Saver Award Economy availability from AKL to SFO on our preferred departure date of January 8.
After searching for AKL-LAX, SYD-LAX, SYD-SFO, BNE-LAX, BNE-SFO, MEL-LAX, and MEL-SFO, there were still no options that worked. I quickly realized we were out of luck trying to get back on our preferred date via Australia or New Zealand. I then thought about returning by way of Asia. Every large gateway city in Asia has flights on United and or Star Alliance partners to the US West Coast – Singapore, Hong Kong, Shanghai, Beijing, Taipei, Tokyo, Osaka, etc.
Since our second and final destination on the trip was Australia, I tried looking for one-way award tickets between SYD and Japan, specifically Tokyo, as both of us have always wanted to visit (I had a 24-hour layover once but it wasn’t enough). I tried SYD to both Tokyo-Narita (NRT) and Tokyo-Haneda (HND) but didn’t find great timing that allowed us to leave on 1/8 for SFO. Tried Osaka too, but no luck.
Note: What’s also challenging about searching for flights this way is that it’s an iterative process. Just because you find flights from SYD-NRT doesn’t mean you’re done. You then need to check to see if you can find tickets from NRT or HND to SFO or LAX. If those don’t exist then there’s no point in flying through Japan in the first place.
Japan didn’t work. Ok, what about Taipei? Nope. Hong Kong? Bingo!
Found flights from SYD to HKG on Thai Airways with a quick layover in Bangkok on 1/6 and found the perfect nonstop flight from HKG to SFO on 1/8.
Step 6: Write down or screenshot all of the flights you’d like to book (flight numbers, departure/arrival cities, times, and airline). You don’t want to have to go through the process all over again because you forgot a route or flight.
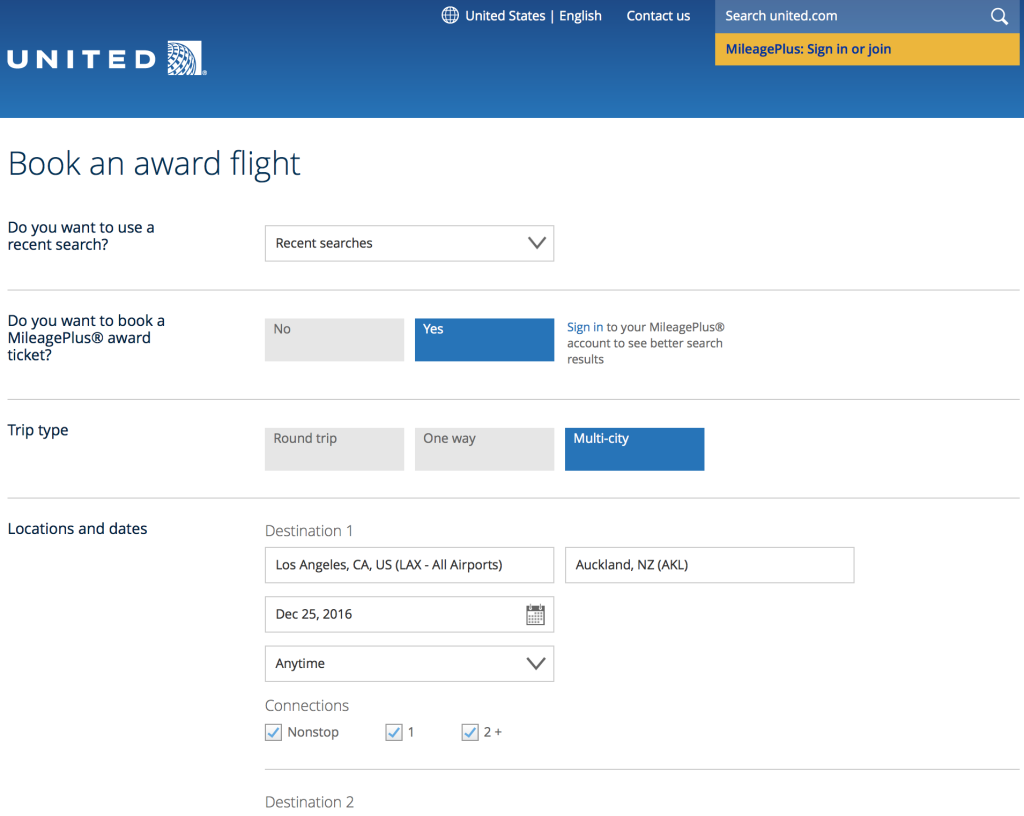
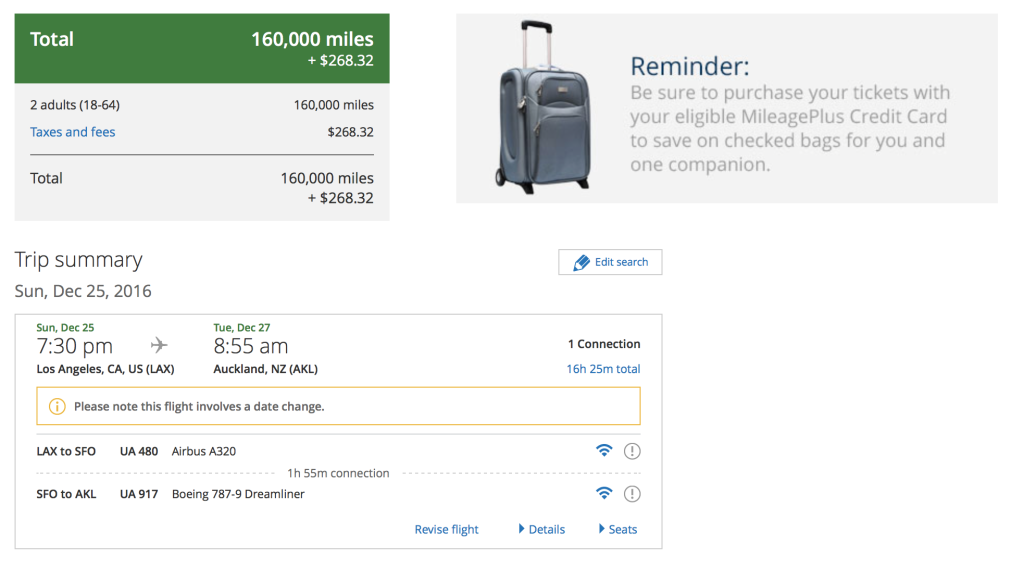
Step 7: Try booking the full itinerary you’ve identified via United’s “Multicity” booking feature. This worked for me insofar as I got to the final page that had the itinerary and the cost breakdown, but for some reason it wouldn’t let me purchase or hold the tickets. Whenever this happens, and it’s common when piecing together flights like this to create a full itinerary, it’s best to call United’s reservation line.
United’s Multi-City booking page. Make sure you select “Yes” under “Do you want to book a MileagePlus award ticket?”
Also, as I mentioned in Step 1, don’t worry about not having all the miles in your United MileagePlus account. We’ll get to that issue in a second.
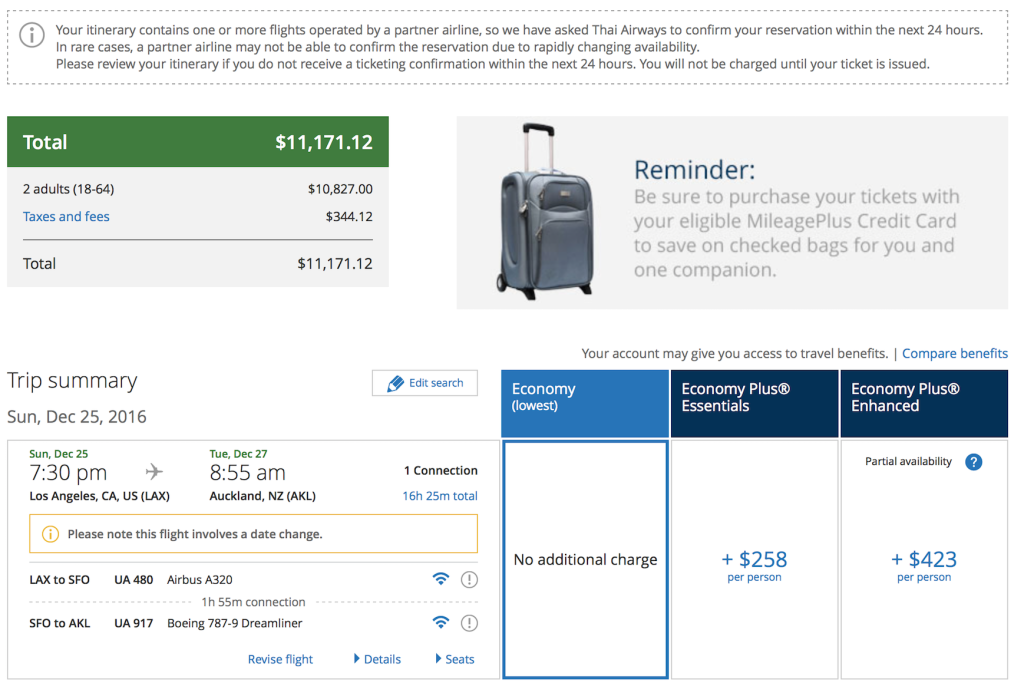
Pricing page didn’t give me the option to buy or hold. When that happens, you have to call.
Step 8: Call United’s reservation line to book the tickets. You’ll usually get United’s call center in the Philippines, and don’t be discouraged by the wait time message when you call in. The last few times I called in it said the wait time was greater than 30 minutes and yet I was speaking with a representative in about 1-2 minutes tops.
Tell the CSR you want to hold a multi-city itinerary for 2 passengers (always make this clear) and then give them the details one at a time. This is critical as unless you’re swimming in United miles you’ll likely need to top up your and or your significant other’s account to cover the cost. United let’s you hold itineraries for 24 hours, however it is sometimes dependent on the airlines you’re traveling on. I didn’t quite understand the CSR but the gist of her comment at the end of my booking call was that I couldn’t hold the Thai Airways flights. Weird, but she gave me a confirmation code nonetheless.
Step 9: Transfer Chase Ultimate Rewards points or SPG points to your United MileagePlus account. This can be done through Chase’s website and they points show up instantaneously.
Note that if you’re trying to book two tickets with points from two United MileagePlus accounts you’ll have to have enough points in each account. The CSRs repeatedly told me my booking had to be split in two because my account balance was 81,000 miles and not the necessary 160,000 miles. This had to be done “manually” by the CSR while I was on the phone. All in all I spent 1.5 hours on the phone with United between holding the flight, splitting the itinerary in two, and finally booking and paying for the tickets.
Step 10: Call United Reservations, give them your confirmation code, and book the tickets! Again, if you’re using two accounts to book the tickets like I was you’ll have to have all of the account information on hand: account number, PIN (what you used to use as the password to log in to your MileagePlus account), and account holder’s full name and date of birth. Before approving the booking be sure to confirm the costs (miles and cash), routes/flight numbers, and dates. If you couldn’t book via the Multi-City tool be sure to mention that and ask that the $25/person phone booking fee be waived. The CSR I had was nice enough to do so without my prompting.
Although this process may seem long, arduous, and confusing, it’s really not and totally worth the time and effort! It’s hard to complain about purchasing $5,500/person tickets around the Pacific for 80,000 United miles and $133 in taxes and fees.

